-
The Outer Worlds 2: You're Using The WRONG Settings!
GeekJWhat if I told you the graphics settings in The Outer Worlds 2 are holding you back? The built-in upscalers are okay, but they're far from the best. In this video, we're going to unlock the absolute best image quality and performance possible. I'll show you how to install a custom FSR mod AND the brand new OptiScaler to make this game look truly next-gen. Let's get started. **Timestamps:** 00:00 – 00:45 Intro & The Problem 00:46 – 10:44 Built-in Upscalers Showcase (TSR, XeSS, FSR) 10:45 – 13:26 Backing Up Original FSR Files 13:27 – 13:47 Installing the INT8 Modded FSR Files 13:48 – 14:51 Introducing OptiScaler v0.9.0-pre5 (Key Features) 14:52 – 16:29 Installing OptiScaler 16:30 – 17:53 Critical Step for AMD Users! 17:54 – 20:00 In-Game Configuration & Settings 20:01 – 26:00 Visual & Performance Showcase 26:01 – 27:19 Conclusion & Thank You! In this comprehensive guide for The Outer Worlds 2, we dive deep into optimizing your game's visuals and performance beyond the default settings. We'll start by showcasing the game's built-in upscalers like TSR, XeSS, and FSR, highlighting their limitations. Then, I'll walk you through replacing the standard FSR DLLs with INT8 modded files for an immediate visual boost. But we won't stop there! Discover how to install and configure the powerful new OptiScaler v0.9.0-pre5, which brings significant improvements in frame generation, broader game compatibility, and crucial fixes. Learn the exact steps to get DLSS4 inputs working with FSR-FG for unparalleled image quality, even on AMD hardware. Get ready to experience The Outer Worlds 2 with truly next-gen graphics and buttery-smooth performance! **Downloads / Resources:** 🔗 INT8 Modded FSR Files: https://gofile.io/d/fiyGuj 🔗 OptiScaler v0.9.0-pre5 (Developer Discord): https://discord.com/invite/2JDHx6kcXB **Connect with GeekJ:** Welcome to GeekJ! I create simple-to-follow tech tutorials, gaming guides, and reviews to help make your tech life simpler and better. 🎮 Twitch: https://twitch.tv/geeks101 📻 https://kick.com/geeks-101 📸 Instagram: https://instagram.com/geeks101_og 📺 Rumble: https://rumble.com/user/GeekJ **My Setup:** CPU: AMD Ryzen 7 5800X3D Motherboard: ASUS TUF GAMING X570-PLUS RAM: Corsair Vengeance RGB RT DDR4-32GB 3600MT/s CL16 GPU: MSI RX 6800 XT GAMING Z TRIO NVME SSD1: Samsung 980 Pro 500GB NVME SSD2: Crucial P3 1TB HDD: WD Blue 4TB #TheOuterWorlds2 #FSR #OptiScaler #PCGaming #GamingOptimization #AMD #RDNA218 views -
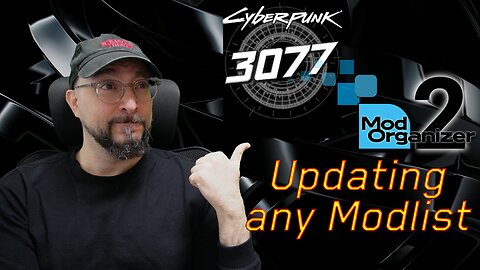
Epic 3077 Modlist Overhaul in MO2 – CP2077 Reborn!
GeekJWatch as I completely revamp and update the 3077 modlist using MO2, transforming Cyberpunk 2077 into an even more immersive Night City experience. Dive into the ultimate modlist overhaul and see CP2077 reborn! 3077 Modlist: https://www.nexusmods.com/games/cyberpunk2077/collections/lv4wpp/changelog Follow me on Twitch for gaming livestreams: https://twitch.tv/geeks101 Follow me on Kick: https://kick.com/geeks-101 Follow me on Instagram: https://www.instagram.com/geeks101_og/ Follow me on YouTube: https://www.youtube.com/@GeekJohn Song: Degrade Music by: CreatorMix.com #Cyberpunk2077 #ModlistOverhaul #MO2 #CP2077 #EpicModding #GeekJ #ViralTech #Gaming Whether you’re a beginner or an IT pro, I create simple to follow tech tutorials so we can all grow together. You might find some unboxings and tech reviews float around as well, splashes of gaming and probably me ranting about… something? :P 📷 Camera Used In This Video: Sony ZV-E10 🎙️ Microphone Used In This Video: Blue Snowball You can call me GeekJ, Geek John or just John, and I hope I’ll be able to teach you how I do things, in a chill relaxed manner, and make your life easier 🤓 🖥️ Gaming/Streaming PC Setup: CPU: AMD Ryzen 7 5800X3D Motherboard: ASUS TUF GAMING X570-PLUS RAM: Corsair Vengeance RGB RT DDR4-32GB 3600MT/s CL16 GPU: MSI RX 6800 XT GAMING Z TRIO NVME SSD1: Samsung 980 Pro 500GB NVME SSD2: Crucial P3 1TB HDD: WD Blue 4TB22 views 1 comment -
I Supercharged Oblivion Remastered on AMD Hardware!
GeekJWatch as I supercharge Oblivion Remastered on my Ryzen 7 5800X3D + RX 6800 XT rig—updating outdated DLSS, FSR & XeSS with DLSS Swapper, then pushing FPS through the roof with modern upscalers. Cyrodiil never looked (or ran) this smooth! DLSS-Swapper: https://github.com/beeradmoore/dlss-swapper Follow me on Twitch for gaming livestreams: https://twitch.tv/geeks101 Follow me on Kick: https://kick.com/geeks-101 Follow me on Instagram: https://www.instagram.com/geeks101_og/ Follow me on YouTube: https://www.youtube.com/@GeekJohn Music from #Uppbeat (free for Creators!): https://uppbeat.io/t/studiokolomna/corsairs License code: 8OCECQGWYINJD5MW #OblivionRemastered #AMD #FSR #XeSS #DLSSSwapper #GamingPerformance #GeekJ #Ryzen75800X3D #RX6800XT #UnrealEngine5 Whether you’re a beginner or an IT pro, I create simple to follow tech tutorials so we can all grow together. You might find some unboxings and tech reviews float around as well, splashes of gaming and probably me ranting about… something? :P 📷 Camera Used In This Video: Sony ZV-E10 🎙️ Microphone Used In This Video: Blue Snowball You can call me GeekJ, Geek John or just John, and I hope I’ll be able to teach you how I do things, in a chill relaxed manner, and make your life easier 🤓 🖥️ Gaming/Streaming PC Setup: CPU: AMD Ryzen 7 5800X3D Motherboard: ASUS TUF GAMING X570-PLUS RAM: Corsair Vengeance RGB RT DDR4-32GB 3600MT/s CL16 GPU: MSI RX 6800 XT GAMING Z TRIO NVME SSD1: Samsung 980 Pro 500GB NVME SSD2: Crucial P3 1TB HDD: WD Blue 4TB32 views 1 comment -
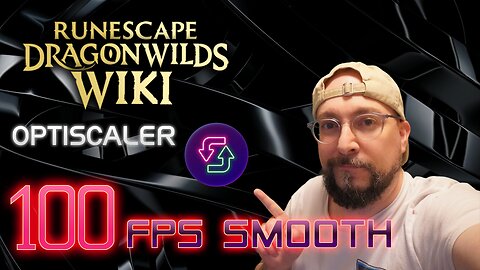
I Turned Dragonwilds from Slideshow to 100+ FPS!
GeekJI turned Dragonwilds from slideshow to 100+ FPS on my AMD rig—UltraPlus, Optiscaler, FrameGen & DLSS Swapper hacks in action! Ultra+ : https://www.nexusmods.com/runescapedragonwilds/mods/3?tab=description Optiscaler: https://github.com/cdozdil/OptiScaler Fakenvapi: https://github.com/FakeMichau/fakenvapi Nukems DLSSG to FSR: https://www.nexusmods.com/site/mods/738 DLSS-Swapper: https://github.com/beeradmoore/dlss-swapper Follow me on Twitch for gaming livestreams: https://twitch.tv/geeks101 Follow me on Kick: https://kick.com/geeks-101 Follow me on Instagram: https://www.instagram.com/geeks101_og/ Follow me on YouTube: https://www.youtube.com/@GeekJohn Music from #Uppbeat (free for Creators!): https://uppbeat.io/t/kevin-macleod/achaidh-cheide License code: IFWMLZ4JGY4OIIF7 #Dragonwilds #Ultraplus #FrameGen #Optiscaler #DLSSswapper #FSR #XeSS #UnrealEngine5 #FPSBoost #GeekJ Whether you’re a beginner or an IT pro, I create simple to follow tech tutorials so we can all grow together. You might find some unboxings and tech reviews float around as well, splashes of gaming and probably me ranting about… something? :P 📷 Camera Used In This Video: Sony ZV-E10 🎙️ Microphone Used In This Video: Blue Snowball You can call me GeekJ, Geek John or just John, and I hope I’ll be able to teach you how I do things, in a chill relaxed manner, and make your life easier 🤓 🖥️ Gaming/Streaming PC Setup: CPU: AMD Ryzen 7 5800X3D Motherboard: ASUS TUF GAMING X570-PLUS RAM: Corsair Vengeance RGB RT DDR4-32GB 3600MT/s CL16 GPU: MSI RX 6800 XT GAMING Z TRIO NVME SSD1: Samsung 980 Pro 500GB NVME SSD2: Crucial P3 1TB HDD: WD Blue 4TB17 views -
I Automated All My Mods with Ultra+ Mod Manager!
GeekJI automated all my mod installs and updates with Ultra+ Mod Manager—no more ZIP extractions or file hunts! Watch me demo UMM on RuneScape: Dragonwilds and see how simple modding can be. Ultra+ Mod Manager: https://www.nexusmods.com/site/mods/1139 Ultra+ : https://www.nexusmods.com/runescapedragonwilds/mods/3?tab=description Ultra Place Discord: https://discord.gg/ultraplace Follow me on Twitch for gaming livestreams: https://twitch.tv/geeks101 Follow me on Kick: https://kick.com/geeks-101 Follow me on Instagram: https://www.instagram.com/geeks101_og/ Follow me on YouTube: https://www.youtube.com/@GeekJohn Music from #Uppbeat (free for Creators!): https://uppbeat.io/t/sensho/coffee-break License code: VGKDTIP6GITIJUWK #UltraPlus #ModManager #RuneScape #Dragonwilds #GamingMods #GeekJ #ModdingMadeEasy #PCGaming Whether you’re a beginner or an IT pro, I create simple to follow tech tutorials so we can all grow together. You might find some unboxings and tech reviews float around as well, splashes of gaming and probably me ranting about… something? :P 📷 Camera Used In This Video: Sony ZV-E10 🎙️ Microphone Used In This Video: Blue Snowball You can call me GeekJ, Geek John or just John, and I hope I’ll be able to teach you how I do things, in a chill relaxed manner, and make your life easier 🤓 🖥️ Gaming/Streaming PC Setup: CPU: AMD Ryzen 7 5800X3D Motherboard: ASUS TUF GAMING X570-PLUS RAM: Corsair Vengeance RGB RT DDR4-32GB 3600MT/s CL16 GPU: MSI RX 6800 XT GAMING Z TRIO NVME SSD1: Samsung 980 Pro 500GB NVME SSD2: Crucial P3 1TB HDD: WD Blue 4TB8 views -
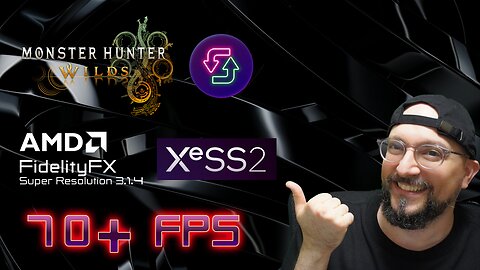
Monster Hunter WIlds Blurry to Clear 70+ FPS in Minutes!
GeekJTransform Monster Hunter Wilds from a blurry mess into a razor-sharp, 70 FPS+ experience using DLSS-Swapper to update FSR & XeSS in minutes—no more washed-out visuals! DLSS-Swapper: https://github.com/beeradmoore/dlss-swapper Follow me on Twitch for gaming livestreams: https://twitch.tv/geeks101 Follow me on Kick: https://kick.com/geeks-101 Follow me on Instagram: https://www.instagram.com/geeks101_og/ Follow me on YouTube: https://www.youtube.com/@GeekJohn Music from #Uppbeat (free for Creators!): https://uppbeat.io/t/roger-gabalda/the-great-wonder License code: AYQRMKWJEBXLIGHN #MonsterHunterWilds #FSR3 #XeSS #DLSSSwapper #FPSBoost #PCGaming #GeekJ Whether you’re a beginner or an IT pro, I create simple to follow tech tutorials so we can all grow together. You might find some unboxings and tech reviews float around as well, splashes of gaming and probably me ranting about… something? :P 📷 Camera Used In This Video: Sony ZV-E10 🎙️ Microphone Used In This Video: Blue Snowball You can call me GeekJ, Geek John or just John, and I hope I’ll be able to teach you how I do things, in a chill relaxed manner, and make your life easier 🤓 🖥️ Gaming/Streaming PC Setup: CPU: AMD Ryzen 7 5800X3D Motherboard: ASUS TUF GAMING X570-PLUS RAM: Corsair Vengeance RGB RT DDR4-32GB 3600MT/s CL16 GPU: MSI RX 6800 XT GAMING Z TRIO NVME SSD1: Samsung 980 Pro 500GB NVME SSD2: Crucial P3 1TB HDD: WD Blue 4TB9 views -
FIX Monster Hunter Wilds Crashes & Boost Performance in Minutes!
GeekJIn this video, I’ll show you how to fix crashes, improve visuals, and speed up texture loading in Monster Hunter Wilds using REFramework, two essential mods, and an update to Microsoft DirectStorage binaries. If you’ve been struggling with crashes or slow texture pop-in, this quick 5-minute fix is for you! We’ll walk through each step, from installing REFramework to downloading mods and updating binaries, so your game runs smoother and looks better than ever. 🔧 What you’ll learn: • How to install REFramework for stability • How to use Nexus Mods to remove visual clutter and boost performance • How to update DirectStorage binaries for faster texture loading 💡 Pro Tip: Make sure to back up your original files before replacing any binaries! If you found this helpful, don’t forget to like, comment, and subscribe for more geeky tutorials and gaming fixes. Check out our previous video on updating FSR binaries for even better visuals! https://youtu.be/967f3Uux5lo REFramework Github: https://github.com/praydog/REFramework Persistent Buff Glow Removal: https://www.nexusmods.com/monsterhunterwilds/mods/141 Disable Lens Distortion: https://www.nexusmods.com/monsterhunterwilds/mods/245 DirectStorage: https://www.nexusmods.com/monsterhunterwilds/mods/127 Follow me on Twitch for gaming livestreams: https://twitch.tv/geeks101 Follow me on Kick: https://kick.com/geeks-101 Follow me on Instagram: https://www.instagram.com/geeks101_og/ Follow me on YouTube: https://www.youtube.com/@GeekJohn Song: So Chill Music by: CreatorMix.com #MonsterHunterWilds #GamingFixes #TechTutorials #PerformanceBoost #GeekJ #MonsterHunterMods #REFramework #DirectStorage #GamingPerformance Whether you’re a beginner or an IT pro, I create simple to follow tech tutorials so we can all grow together. You might find some unboxings and tech reviews float around as well, splashes of gaming and probably me ranting about… something? :P 📷 Camera Used In This Video: Sony ZV-E10 🎙️ Microphone Used In This Video: Blue Snowball You can call me GeekJ, Geek John or just John, and I hope I’ll be able to teach you how I do things, in a chill relaxed manner, and make your life easier 🤓 🖥️ Gaming/Streaming PC Setup: CPU: AMD Ryzen 7 5800X3D Motherboard: ASUS TUF GAMING X570-PLUS RAM: Corsair Vengeance RGB RT DDR4-32GB 3600MT/s CL16 GPU: MSI RX 6800 XT GAMING Z TRIO NVME SSD1: Samsung 980 Pro 500GB NVME SSD2: Crucial P3 1TB HDD: WD Blue 4TB19 views -
Mod Oblivion Remastered Like a PRO with MO2 in 2025! 🔥
GeekJWelcome back to GeekJ, where we make tech, tutorials, and gaming simpler and better! In this video, we’re diving into modding The Elder Scrolls IV: Oblivion Remastered with Mod Organizer 2 (MO2) version 2.5.3 – Beta 2. We’ll walk you through downloading the right tools, setting up MO2, and installing three essential mods to make your game look and play better than ever! 🔧 What you’ll learn: • How to download and set up MO2 and LOOT for Oblivion Remastered • Manually installing OBSE64 and UE4SS • Installing the Unofficial Oblivion Remastered Patch, FuzzUI, and Auto Local Map via MO2 • Keeping your game folder clean with MO2 profiles 💡 Pro Tip: Rename your MO2 folder to avoid confusion with other game instances! Links to MO2, LOOT, and all mods are in the description below. If this guide helps you mod like a pro, smash that like button, subscribe, and drop a comment with your favorite Oblivion mod! Check out our other gaming tutorials for more geeky goodness. 🔗 MO2 Discord: https://discord.gg/r7c9atzYRx 🔗 LOOT Download: https://github.com/loot/loot/releases 🔗 OBSE64: https://www.nexusmods.com/oblivionremastered/mods/282?tab=description 🔗 UE4SS: https://www.nexusmods.com/oblivionremastered/mods/32?tab=description 🔗 UE4SS Loader: https://www.nexusmods.com/oblivionremastered/mods/3421 🔗 Unofficial Oblivion Remastered Patch: https://www.nexusmods.com/oblivionremastered/mods/477?tab=description 🔗 FuzzUI: https://www.nexusmods.com/oblivionremastered/mods/292?tab=description 🔗 Auto Local Map: https://www.nexusmods.com/oblivionremastered/mods/1119?tab=description Follow me on Twitch for gaming livestreams: https://twitch.tv/geeks101 Follow me on Kick: https://kick.com/geeks-101 Follow me on Instagram: https://www.instagram.com/geeks101_og/ Follow me on YouTube: https://www.youtube.com/@GeekJohn #OblivionRemastered #ModOrganizer2 #GamingMods #TechTutorials #GeekJ #ElderScrollsMods #MO2Guide #Gaming2025 #NexusMods #ModdingTutorial Whether you’re a beginner or an IT pro, I create simple to follow tech tutorials so we can all grow together. You might find some unboxings and tech reviews float around as well, splashes of gaming and probably me ranting about… something? :P 📷 Camera Used In This Video: Sony ZV-E10 🎙️ Microphone Used In This Video: Blue Snowball You can call me GeekJ, Geek John or just John, and I hope I’ll be able to teach you how I do things, in a chill relaxed manner, and make your life easier 🤓 🖥️ Gaming/Streaming PC Setup: CPU: AMD Ryzen 7 5800X3D Motherboard: ASUS TUF GAMING X570-PLUS RAM: Corsair Vengeance RGB RT DDR4-32GB 3600MT/s CL16 GPU: MSI RX 6800 XT GAMING Z TRIO NVME SSD1: Samsung 980 Pro 500GB NVME SSD2: Crucial P3 1TB HDD: WD Blue 4TB7 views -
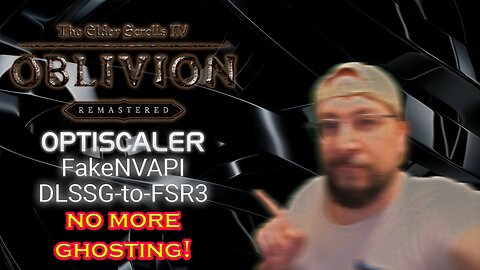
Supercharge Oblivion Remastered with OptiScaler – No Lag, All GPUs! 💥
GeekJWelcome back to GeekJ, where we make tech, tutorials, and gaming simpler and better! In this video, we’re taking The Elder Scrolls IV: Oblivion Remastered to the next level with OptiScaler, FakeNVAPI, and DLSS-to-FSR. Say goodbye to FSR Frame Gen ghosting and hello to smooth FPS, custom upscalers, and low latency—whether you’re on AMD, Intel, or NVIDIA GPUs! 🔧 What you’ll learn: • How to install OptiScaler, FakeNVAPI, and DLSS-to-FSR • Configuring OptiScaler for your GPU (NVIDIA or AMD/Intel) • Choosing the best upscaler (FSR or XeSS) with Frame Generation and Sharpening • Avoiding crashes with the right game settings • 💡 Pro Tip: Check out my previous video on updating upscaler binaries to ensure you’re using the latest tech! Links to OptiScaler, FakeNVAPI, DLSS-to-FSR, and more are below. If this guide boosts your Oblivion experience, smash that like button, subscribe, and drop a comment with your favorite upscaler! Stay geeky with our other gaming tutorials. 🔗 OptiScaler GitHub: https://github.com/cdozdil/OptiScaler 🔗 FakeNVAPI GitHub: https://github.com/FakeMichau/fakenvapi 🔗 DLSS-to-FSR: https://www.nexusmods.com/site/mods/738?tab=description Follow me on Twitch for gaming livestreams: https://twitch.tv/geeks101 Follow me on Kick: https://kick.com/geeks-101 Follow me on Instagram: https://www.instagram.com/geeks101_og/ Follow me on YouTube: https://www.youtube.com/@GeekJohn #OblivionRemastered #OptiScaler #GamingPerformance #TechTutorials #GeekJ #FakeNVAPI #DLSStoFSR #UpscalingGuide #Gaming2025 #NoLag Whether you’re a beginner or an IT pro, I create simple to follow tech tutorials so we can all grow together. You might find some unboxings and tech reviews float around as well, splashes of gaming and probably me ranting about… something? :P 📷 Camera Used In This Video: Sony ZV-E10 🎙️ Microphone Used In This Video: Blue Snowball You can call me GeekJ, Geek John or just John, and I hope I’ll be able to teach you how I do things, in a chill relaxed manner, and make your life easier 🤓 🖥️ Gaming/Streaming PC Setup: CPU: AMD Ryzen 7 5800X3D Motherboard: ASUS TUF GAMING X570-PLUS RAM: Corsair Vengeance RGB RT DDR4-32GB 3600MT/s CL16 GPU: MSI RX 6800 XT GAMING Z TRIO NVME SSD1: Samsung 980 Pro 500GB NVME SSD2: Crucial P3 1TB HDD: WD Blue 4TB27 views -
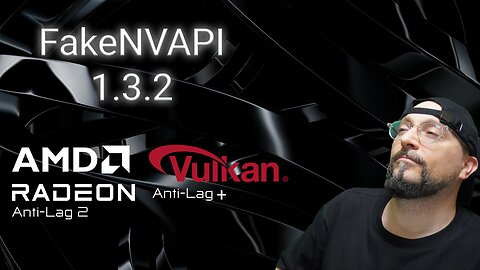
Fix FrameGen Lag in Oblivion Remastered - Update FakeNVAPI Today!
GeekJWelcome back to GeekJ, where we make tech, tutorials, and gaming simpler and better! In this video, we’re tackling FrameGen lag in The Elder Scrolls IV: Oblivion Remastered by updating to FakeNVAPI v1.3.2. If you’re on an AMD GPU, this update improves AntiLag 2 for smoother, lag-free gameplay AND finally adds AntiLag+ for Vulkan—no more choppy frames or input delays! 🔧 What you’ll learn: How to download and install FakeNVAPI v1.3.2 Verifying AntiLag 2 with the in-game overlay Why this update is a game-changer for AMD users 💡 Pro Tip: Press Alt+Shift+L to check your AntiLag status—White indicator means you’re good to go! Grab the update from the FakeNVAPI GitHub (link below). If this fix boosts your Oblivion experience, smash that like button, subscribe, and let me know in the comments how it’s running for you! Check out our other gaming tutorials for more geeky goodness. 🔗 FakeNVAPI GitHub: https://github.com/FakeMichau/fakenvapi Follow me on Twitch for gaming livestreams: https://twitch.tv/geeks101 Follow me on Kick: https://kick.com/geeks-101 Follow me on Instagram: https://www.instagram.com/geeks101_og/ Follow me on YouTube: https://www.youtube.com/@GeekJohn #OblivionRemastered #FakeNVAPI #GamingPerformance #TechTutorials #GeekJ #AntiLag2 #AMDGPU #FrameGenFix #Gaming2025 #NoLag Whether you’re a beginner or an IT pro, I create simple to follow tech tutorials so we can all grow together. You might find some unboxings and tech reviews float around as well, splashes of gaming and probably me ranting about… something? :P 📷 Camera Used In This Video: Sony ZV-E10 🎙️ Microphone Used In This Video: Blue Snowball You can call me GeekJ, Geek John or just John, and I hope I’ll be able to teach you how I do things, in a chill relaxed manner, and make your life easier 🤓 🖥️ Gaming/Streaming PC Setup: CPU: AMD Ryzen 7 5800X3D Motherboard: ASUS TUF GAMING X570-PLUS RAM: Corsair Vengeance RGB RT DDR4-32GB 3600MT/s CL16 GPU: MSI RX 6800 XT GAMING Z TRIO NVME SSD1: Samsung 980 Pro 500GB NVME SSD2: Crucial P3 1TB HDD: WD Blue 4TB13 views 1 comment