-
9 Page Target Tutorial - PrintMyTargets
PrintMyTargetsOur 9-Page targets can be printed right at home on a standard printer. These are Large-sized targets and make for an awesome shooting experience. They are our personal favorite target size. They take about ~5 minutes to assemble depending on experience. We recommend using 8.5x11" (US Letter) printing paper. Check out our Step-by-Step Guide on Our Website: https://printmytargets.com/tutorials/9-page-paper-target-tutorial.html Like the Target in the Video? Get it here: https://printmytargets.com/product.html?product=766697379 Browse more of our targets by heading over to our website: https://printmytargets.com What Materials Are Needed? 9 Page Paper Target & Transparent Tape Estimated Time to Create Target: 4-10 Minutes Depending on Experience What is needed to assemble the 9 page paper target? You only need transparent tape and a 9 page target that has been printed out to create this target. Step 1 Please assemble the target pages in order. The row and page numbers are in the bottom right-hand corner of each page. Start with the bottom row first.Row and page numbers are in the bottom-right corner of each page. Step 2 Next, please fold the paper on the red dotted lines as shown in the example below. While the red dotted lines may not reach the very edge of the paper, please ensure you fold the full length of the paper when folding. For rows 3 and 2, make 5 folds each. Row 1 only needs 2 folds. Begin with the bottom row first. The image below shows where to fold row 3. Be sure to fold the paper fully along the red dotted line. There should be a total of 5 folds for row 3.Go ahead and fold on the red dotted lines. Step 3 Great, now let’s tape the pages together (bottom row of pages). Please line the paper up and ensure you tape the top and bottom edges of the paper. We also recommend taping the middle section of the pages to add extra strength to the target. Great, now put this completed row to the side for now. Step 4 Now repeat the same process for row 2. Step 5 Now, do the same thing for row 1, but this time, you'll only need to make 2 folds since it's the top row. Step 6 Now that you've taped each row, let's assemble the full target. Place the rows in order and tape them together. Be sure to tape the edges on both the left and right sides, the center of the paper, and where the four pages meet on both sides of the target's center. All Done.58 views -
1 Page Self-Standing Target Tutorial - PrintMyTargets
PrintMyTargetsOur single page self-standing foldable paper target is the world's first self-standing double-sided paper target that can easily be assembled with a single sheet of printer paper and two pieces of tape. When printing this target at home, we recommend using 8.5x11" printer paper. Check out our Step-by-Step Guide on Our Website: https://printmytargets.com/tutorials/1-page-self-standing-paper-target-tutorial.html Like the Target in the Video? Get it here: https://printmytargets.com/product.html?product=1872511281 Browse more of our targets by heading over to our website: https://printmytargets.com What Materials Are Needed? 1 Page Double-Sided Self-Standing Paper Target & Transparent Tape Estimated Time to Create Target: 20-60 Seconds Step 1 Please flip the page upside down and tape two diagonal corners together. This requires that you place 1 corner of the paper within the L shaped border of the other. However, do not overlap a corner of the paper past the L shaped border, as this may cause the paper to be too short when folding and taping the other corners in step 2. Step 2 Now, please do the same for the other pair of corners. However, please note that for these two corners you do not need to fully place them within the L shaped border. You can simply have the two corners of the paper touch and then tape them in place. Note: For extra durability, it’s a great idea to add a second piece of tape to secure the corners even more. Step 3 Check the target and eliminate any imperfections by pulling on the corners of the target. If everything looks good, you can stop here, or you can continue to STEP 4 (optional). Step 4 (Optional) Fold on the horizontal dashed line and the left and right edges of the target to hold the target firmly in place. TIP: To keep the target from blowing away in the wind when shooting outdoors, it is possible to place rocks, pebbles, dirt, or twigs in the open back of the target to weigh it down. However, please ensure you keep a safe distance if doing so. Tip: Place rocks, pebbles, or twigs in the open back of the target to keep it from blowing away in the wind if you are shooting outdoors. In the video, you will see an example paper target that was shot with .308 rifle rounds. All Done.56 views -
4 Page Self-Standing Target Tutorial - PrintMyTargets
PrintMyTargetsOur 4-Page self-standing foldable paper target is the larger version of the single page self-standing target. It can be assembled similar to the single page self standing target with a few additional steps. We recommend using 8.5x11" printer paper. Check out our Step-by-Step Guide on Our Website: https://printmytargets.com/tutorials/4-page-self-standing-paper-target-tutorial.html Like the Target in the Video? Get it here: https://printmytargets.com/product.html?product=1872511281 Browse more of our targets by heading over to our website: https://printmytargets.com What Materials Are Needed? 4 Page Double-Sided Self-Standing Paper Target & Transparent Tape Estimated Time to Create Target: 2-5 Minutes Step 1 Please assemble the target pages in order. The row and page numbers are in the bottom right-hand corner of each page. Step 2 Next, please fold the paper on the red dotted lines as shown in the example below. While the red dotted lines may not reach the very edge of the paper, please ensure you fold the full length of the paper when folding. Step 3 Great, now let’s tape the pages together (the bottom row of pages). Please line the paper up and ensure you tape the top and bottom edges of the paper. We also recommend taping the middle section of the pages to add extra strength to the target. Step 4 Now repeat the same process for the top row. Step 5 Great, now let's tape the top row and the bottom row of pages together to form 1 single target. Place the bottom row on top of the top row of pages near the bottom, as shown in the image below. Step 6 Now, please flip the target upside down and tape two diagonal corners together. Place 1 corner of the paper in the L shaped border of the opposite corner and then tape it securely in place. (We recommend using two pieces of tape) In the image below, you'll notice that the two corners are taped together with two pieces of tape. Each corner meets the other corner's L shaped border without going past it. Remember, if you let the corners cover or go past the L shaped border, then you might have trouble when you try to tape the next set of corners and may need to start over. Step 7 Now, please do the same for the other two corners of the paper. Note: For these two corners, you do not need to fully place them within the L shaped border. Simply have the two corners touch and then tape them in place. This should form a pyramid looking paper shooting target that is now double sided. And remember, you can add more tape for extra strength. Step 8 Check the target for imperfections. After creating the self-standing target, there will likely be a few accidental folds or dents in the paper. You can gently but firmly pull on the corners of the paper target to pop these folds and dents out of the target. The back of the target also allows you to place your hand inside of the target and push these dents out with your fingers. Step 9 (Optional) Check the target for imperfections. After creating the self-standing target, there will likely be a few accidental folds or dents in the paper. You can gently but firmly pull on the corners of the paper target to pop these folds and dents out of the target. The back of the target also allows you to place your hand inside of the target and push these dents out with your fingers. All Done.92 views -
4 Page Target Tutorial - PrintMyTargets
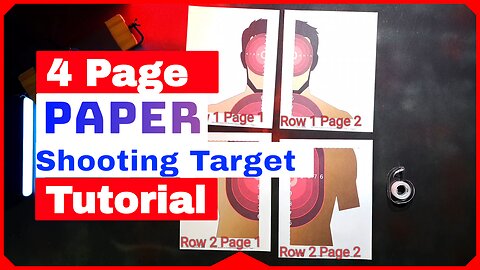
PrintMyTargetsOur 4-Page target can be printed and assembled right at home in about 2 minutes. All you need is the 4-page printed target and some transparent tape. When printing the 4-Page PDF files, we recommend using 8.5x11" (US Letter) printing paper. Check out our Step-by-Step Guide on Our Website: https://printmytargets.com/tutorials/4-page-paper-target-tutorial.html Like the Target in the Video? Get it here: https://printmytargets.com/product.html?product=766697379 Browse more of our targets by heading over to our website: https://printmytargets.com What Materials Are Needed? 4 Page Paper Target & Transparent Tape Estimated Time to Create Target: 1-3 Minutes Depending on Experience Step 1 Please assemble the target pages in order. The row and page numbers are in the bottom right-hand corner of each page. Step 2 Next, please fold the paper on the red dotted lines as shown in the example below. While the red dotted lines may not reach the very edge of the paper, please ensure you fold the full length of the paper when folding. There should be a total of 4 folds per 4-page paper target. Please start with the bottom half (bottom row) of the target. Step 3 Great, now let’s tape the pages together (the bottom row of pages). Please line the paper up and ensure you tape the top and bottom edges of the paper. We also recommend taping the middle section of the pages to add extra strength to the target. Great, now put this completed row to the side for now. Step 4 Now repeat the same process for the top row. Step 5 Great, now let's tape the top row and the bottom row of pages together to form 1 single target. Place the bottom row on top of the top row of pages near the bottom, as shown in the image below. Tape the center and the left and right edges.Please press down firmly on the tape to ensure the target pages are secure. After securing the pages with tape, you are all done creating your 4 page target. All Done.74 views -
16 Page Target Tutorial - PrintMyTargets
PrintMyTargetsOur 16-Page target can be printed and assembled right at home. It is a much larger target version than the 1-page or 4-page targets (life size). All you need is the printed target and some tape. When printing the 16-Page PDF files, we recommend using 8.5x11" (US Letter) sized printing paper. Check out our Step-by-Step Guide on Our Website: https://printmytargets.com/tutorials/16-page-paper-target-tutorial.html Like the Target in the Video? Get it here: https://printmytargets.com/product.html?product=766697379 Browse more of our targets by heading over to our website: https://printmytargets.com What Materials Are Needed? 16 Page Paper Target & Transparent Tape Estimated Time: 10-20 Minutes Depending on Experience Step 1 Please assemble the 4th row (bottom row) of pages in order. The row and page numbers for each page are in the bottom right-hand corner of each page. Step 2 Next, please fold the paper on the red dotted lines as shown in the example below. While the red dotted lines may not reach the very edge of the paper, please ensure you fold the full length of the paper when folding. Step 3 Now, let's tape the pages together after all 4 have been properly folded. Please ensure that you tape the top and bottom edges of the paper. The middle of the page can also be taped for extra strength (recommended). Once you are finished, please set the row to the side. Step 4 Once you have completed row 4, you will now need to repeat the process for row 3. Please fold your pages on the red dotted lines and then tape them together. Once you are finished, please set this completed row to the side. Step 5 Great job. Now, you will now need to repeat the process for row 2. Please fold your pages on the red dotted lines and then tape them together. Once you are finished, please set this completed row to the side. Step 6 Now, please repeat the process and complete row 1 (the final row). Please fold your pages on the red dotted lines and then tape them together. Row 1 will have less folds than the previous rows had (only 3 folds). Once you are finished, please set this completed row to the side. Step 7 Now, please tape row 1 and row 2 together as shown in the images below. Row 2 will sit on top of the logos and text of row 1. Once you have lined up the rows and images, please tape the rows in place. Tip: Try positioning the tape so that it sticks to 4 pages rather than just 2. This will help your target hold together much better when used at the shooting range. And remember to tape your right and left edges. Once you are finished, please set this completed half to the side. Step 8 Now, please tape row 3 and row 4 together, similar to how you taped row 1 and row 2 together. (see step 7 for specific directions) Step 9 Great, now we can finally tape the two halves together to complete our large sized (16 page) shooting target. Once again, please try positioning the tape so that it sticks to 4 pages rather than just 2. This will help your target hold together much better when used at the shooting range. And remember to tape your left and right edges so that your target holds together properly. Step 10 (optional) Now that the target is complete, additional tape can be added to the backside of the target for extra durability. Note: Adding a few strips of duct tape on the backside of the target can help make the target extremely durable. All Done.61 views