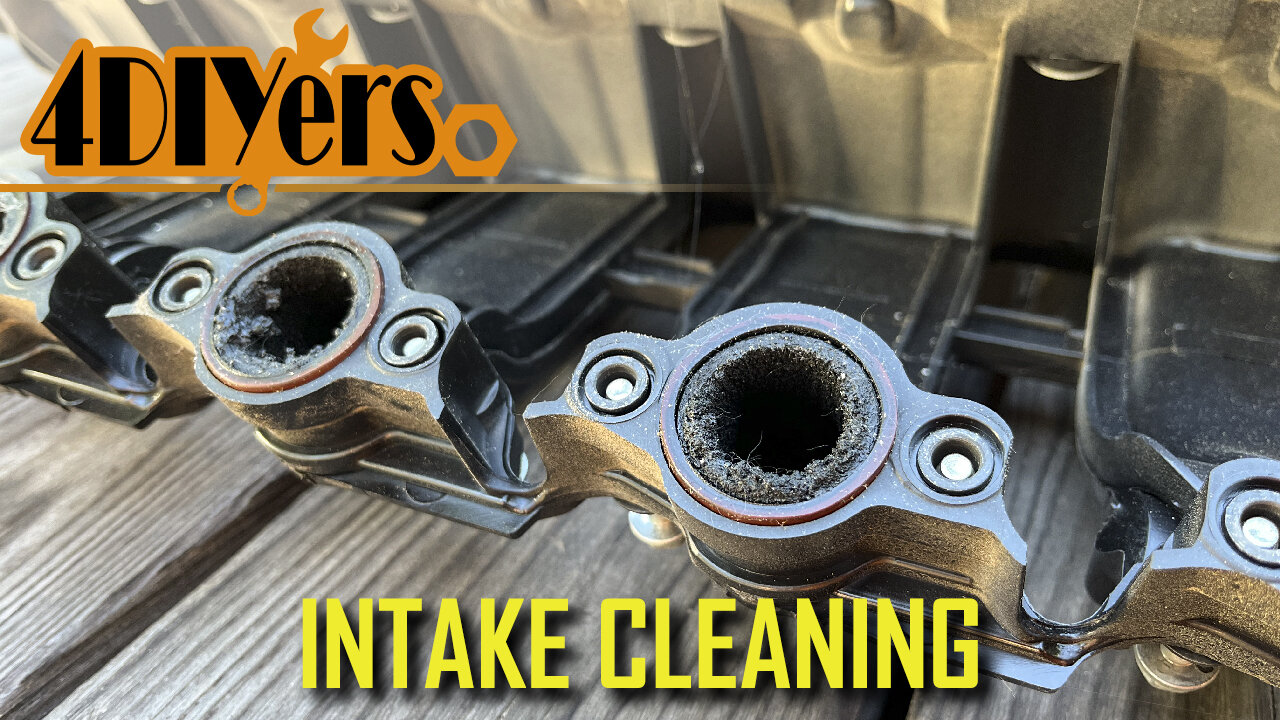
How to Clean Carbon Build up from a Plastic Intake
How to clean carbon build-up in a plastic intake. Depending on the engine design, its condition, and maintenance history, this will affect how much carbon build up inside the intake. For this I am using my 2010 BMW 335d as an example and unfortunately this particular engine, the M57 is known for having this problem. With plastic intakes, you’ll need to be extremely careful not to damage the intake where you risk jeopardizing its durability such as using harsh chemicals. Plastic intakes also cannot be exposed to any media blasting either. #turnermotorsport #oemtools #bmwm57
Throttle body gasket: http://bit.ly/3IQ4Sob
Intake manifold gasket (round): http://bit.ly/3YWNJyJ
Intake manifold gasket (rectangular): http://bit.ly/3EyfYeJ
OEMTOOLS Magnetic Foldable Trays 26052: https://www.mobiledistributorsupply.com/26052-oemtoolstools-oemtools-26052-magnetic-foldable-tray-4-pack
Website: http://4diyers.com
Patreon: https://www.patreon.com/4diyers
Facebook: https://www.facebook.com/4diyers
Twitter: https://twitter.com/4DIYers
Instagram: https://www.instagram.com/4diyers/
Tumblr: http://4diyers.tumblr.com
Pintrest: https://www.pinterest.com/4diyers/
Tools/Supplies Needed:
-citrius degreaser
-hot water
-big bucket
-dull/worn standard screwdriver
-round brushes
-required tools for removal
-new gaskets
Chapters:
00:00 Intro
00:20 Removal Overview
01:10 Stripping Down the Intake
03:54 Basic Cleaning
04:20 Deep Cleaning
05:51 EGR Valve Cleaning
06:22 Reassembly
Procedure:
Once that intake has been removed, now is further disassembly. All the old gaskets, fasteners, clips, sensors and any other components will need to be removed. The intake should be stripped down to only the intake and no other components.
Using a worn standard screwdriver with no sharp edges, scrape out as much of the build-up as possible from the intake. This will help with the cleaning process and allow the cleaner to bite in quicker. Simply rotate the screwdriver around inside the holes and then wipe on a paper towel.
I have a garbage can filled with some hot water. I boiled water using my propane heater with a pot. A citrus cleaner is then dumped into the water, this is a concentrated cleaner that mixes with the water.
To provide some agitation for the intake, I’ll stick a hose inside the intake connected to an air valve, which was running at about 5 psi from the air compressor. Eventually more water was added to the intake so it was fully submerged.
The intake is soaked for about three hours, this will depend on the severity of the buildup. The intake was then removed, and the pressure washer was used to wash out any softened build-up inside. make sure you are doing this in an area where you don’t stain any surrounding surfaces.
If you do find the is some buildup left over, use a round brush to clean the inside of each of the runners. A popsicle stick can also be used to help scrape away any residue inside. The intake, and then be soaked again or you can spray cleaner inside each of the runners.
A pressure washer is then used again to wash out the intake runners when washing out the intake make sure you don’t get any dirt inside the intake runners which can cause damage to your engine.
As for the EGR assembly, use a doll standard screwdriver to scrape away any residue on the inside. Use brake cleaner to wash away the remaining residue. A toothbrush can also be used to help agitate the surface. Again wash away any remaining residue with the brake cleaner.
Swirl flap caps are then installed along with the actuator. These caps are only intended for off-road use. This is not a street legal modification, this goes against laws that no longer make the vehicle fit for the road.
The gasket surfaces are cleaned with a paper towel to ensure there are no contaminants that may cause sealing issues. The newly supplied gaskets from Turner Motorsport is then installed. These gaskets simply fit into a groove, they’re held into place so there is minimal risk of them falling out during the installation.
The gasket surfaces on the engine were cleaned using a cloth with brake cleaner. This will remove any built-up residue which could potentially cause sealing issues. If you do find any hard surface imperfections or built-up debris, green scotch-brite can be used for this.
After that is installing everything in reverse of removal.
Thank you to all those who watch my videos and support my content. Don't forget to subscribe to my channel for future tutorial videos and like my video if you found it helpful. New videos are always being uploaded every week!
© 4DIYers 2013
All Rights Reserved
No part of this video or any of its contents may be reproduced, copied, modified or adapted, without the prior written consent of the author.
-
 37:49
37:49
theyoungrightusa
14 hours ago $3.37 earnedThe Young Right X AmFest
13.4K2 -
 2:02:50
The Culture War with Tim Pool
4 hours agoThe FALL of Candace Owens | The Culture War with Tim Pool
218K332 -
 1:14:53
Sean Unpaved
3 hours agoThe College Football Playoff Begins Today With Alabama vs. Oklahoma | UNPAVED
13.3K -
 1:36:33
Misfits Mania
2 days ago $14.03 earnedMISFITS MANIA: Weigh-In & Award Ceremony
51.6K10 -
 LIVE
LIVE
Dr Disrespect
4 hours ago🔴LIVE - DR DISRESPECT - ARC RAIDERS - THE FINISH LINE
1,046 watching -
 47:31
47:31
Watchmen Action: Ezekiel 33:6 - Equip The Church To Engage The Culture
5 hours ago $1.35 earnedThe Watchmen Brief LIVE From AmFest2025!
22.2K1 -
 1:00:45
Graham Allen
4 hours agoLive From AMFEST 2025: Day 2
48.2K38 -
 LIVE
LIVE
LFA TV
11 hours agoLIVE & BREAKING NEWS! | FRIDAY 12/19/25
1,300 watching -
 1:50:19
The Mel K Show
4 hours agoMORNINGS WITH MEL K-The Lawfare Squad Takes a Victory Lap-Indefensible Idiocy is to Blame! 12-19-25
23.1K14 -

The Shannon Joy Show
5 hours ago🔥SJ LIVE Dec 19 - Friday Midday Matinee W/Shannon Joy! Featuring "American Experience: Jonestown"🔥
19.9K3