make a marking gauge
Materials Needed:
Hardwood stock (such as maple or beech) for the body
Steel rod or screw for the marking point
Small brass or steel knob
Wood glue
Sandpaper
Finish (such as oil or wax)
Tools Needed:
Saw (hand saw or table saw)
Drill and bits
Chisel
Mallet
File
Screwdriver
Step-by-Step Guide:
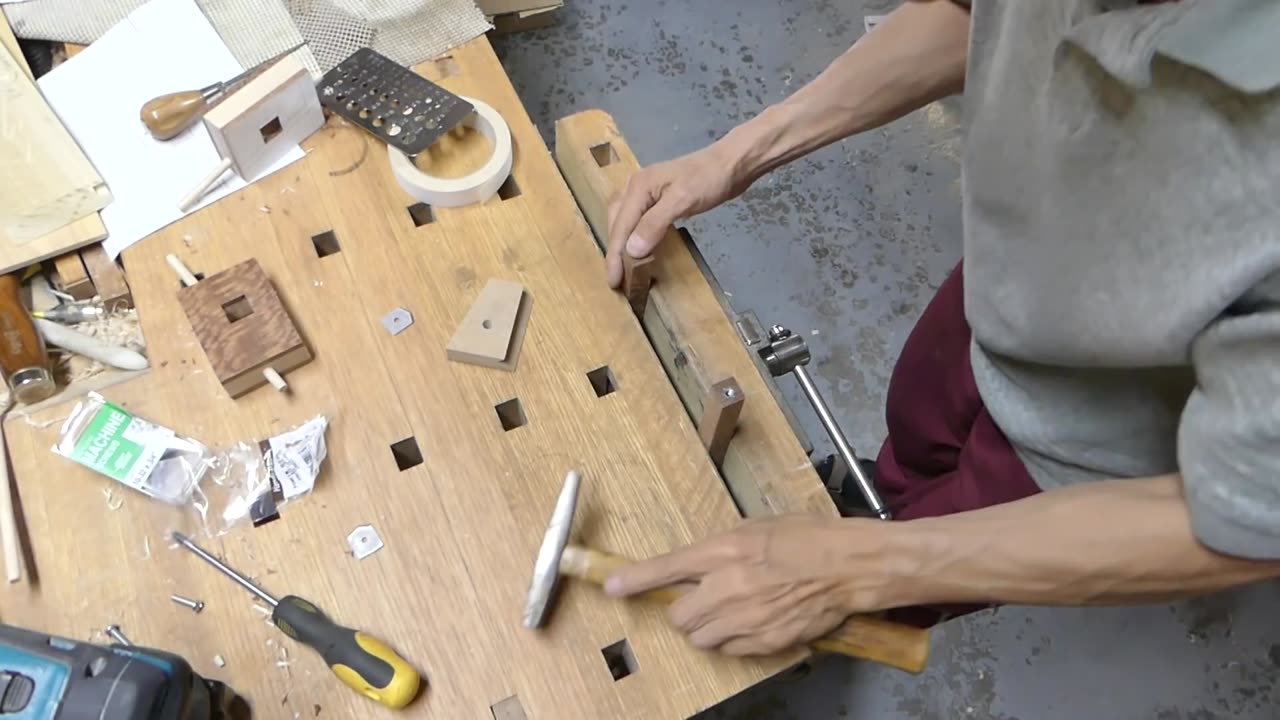
Prepare the Stock:
Begin by cutting your hardwood stock to the desired length for the marking gauge body. A length of around 8 to 10 inches should be sufficient for most projects.
Shape the Body:
With the stock cut to length, shape it into a rectangular or oval shape, depending on your preference. You can use a saw and chisel to remove excess material and refine the shape.
Drill Holes:
Next, drill two holes near one end of the body: one for the marking point and one for the knob. The hole for the marking point should be drilled perpendicular to the face of the body, while the hole for the knob can be drilled at a slight angle to provide clearance.
Insert the Marking Point:
Insert the steel rod or screw into the hole drilled for the marking point, leaving a small amount protruding from the face of the body. Secure it in place with wood glue, and allow it to dry thoroughly.
Add the Knob:
Insert the small brass or steel knob into the hole drilled for it, and secure it in place with a screw. This will serve as the locking mechanism for the marking gauge.
Shape the Marking Point:
Once the glue has dried, shape the marking point to a sharp tip using a file or sharpening stone. This will ensure clean and accurate marking lines.
Sand and Finish:
Sand the entire marking gauge body to smooth out any rough edges or surfaces. Apply a finish of your choice, such as oil or wax, to protect the wood and enhance its appearance.
Test and Adjust:
Before using the marking gauge on your woodworking projects, test it to ensure that the marking point moves smoothly and locks securely in place. Make any necessary adjustments to the knob or marking point to achieve the desired tension.
Use and Enjoy:
With your marking gauge complete, you're ready to start using it in your woodworking projects! Whether you're laying out joinery or marking dimensions, your homemade marking gauge will provide accurate and reliable results for years to come.
-
 20:19
20:19
MetatronHistory
2 days agoThe Mystery of Catacombs of Paris REVEALED
7.29K2 -
 21:57
21:57
GritsGG
17 hours agoBO7 Warzone Patch Notes! My Thoughts! (Most Wins in 13,000+)
11.6K -
 2:28:08
PandaSub2000
11 hours agoMyst (Part 1) | MIDNIGHT ADVENTURE CLUB (Edited Replay)
8.02K -
 1:12:43
TruthStream with Joe and Scott
5 days agoJason Van Blerk from Human Garage: Reset your life with Fascial Maneuvers,28 day reset, Healing, Spiritual Journey, Censorship, AI: Live 12/3 #520
17.1K4 -
 24:21
24:21
The Pascal Show
1 day ago $8.98 earned'CHALLENGE ACCEPTED!' TPUSA Breaks Silence On Candace Owens Charlie Kirk Allegations! She Responds!
38.1K23 -
 17:41
17:41
MetatronGaming
2 days agoI should NOT Have taken the elevator...
12.4K2 -
 LIVE
LIVE
Lofi Girl
3 years agolofi hip hop radio 📚 - beats to relax/study to
543 watching -
 1:20:23
Man in America
14 hours agoHow Epstein Blackmail & FBI Cover-Ups Are Fracturing MAGA w/ Ivan Raiklin
199K38 -
 2:13:49
Inverted World Live
10 hours agoSolar Storms Ground 1000 Planes | Ep. 151
115K10 -
 2:54:08
TimcastIRL
10 hours agoJ6 Pipe Bomb Suspect ARRESTED, Worked With BLM, Aided Illegal Immigrants | Timcast IRL
265K147