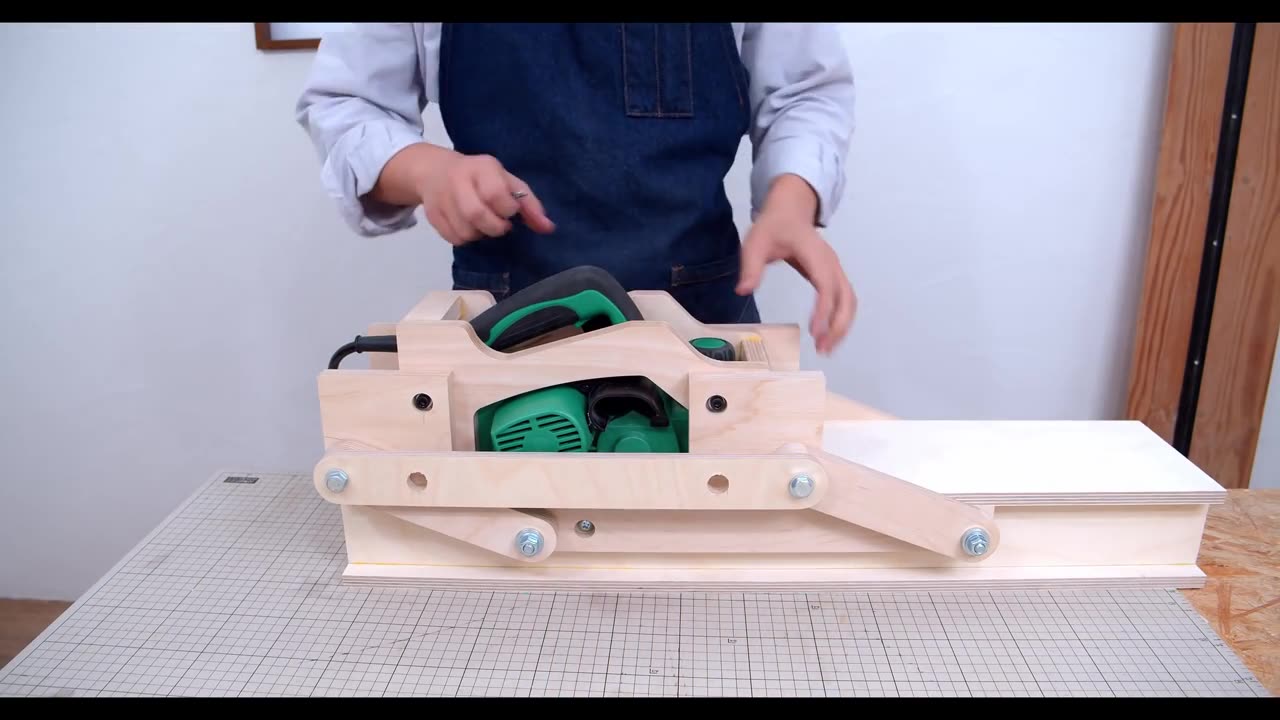
Parallel link Planer jig - Rig System Part.2
For Part 2 of your parallel link planer jig rig system project, you can focus on constructing the moving parts and fine-tuning the alignment for precise planing results. Here's a breakdown of what you can cover:
Introduction:
Recap briefly on what was covered in Part 1, which likely included designing and building the base or framework for the jig rig system.
Introduce the focus of Part 2, which is to create the moving parts and ensure smooth operation.
Materials and Tools:
Provide a list of additional materials and tools needed for this part of the project, such as:
Metal or wooden bars for the parallel links
Screws, bolts, and washers
Hinges or pivots for connecting the links
Leveling feet or adjustable supports
Measuring tools for precise alignment
Construction Steps:
Building the Parallel Links:
Cut the metal or wooden bars to the desired length for the parallel links.
Attach hinges or pivots to one end of each link to allow for movement.
Mounting the Links:
Attach the parallel links to the base of the jig rig system using screws, bolts, and washers.
Ensure the links are mounted securely and aligned parallel to each other and perpendicular to the planer.
Connecting the Planer:
Install brackets or mounts on the parallel links to secure the planer in place.
Test the movement of the planer along the parallel links to ensure smooth sliding motion.
Fine-Tuning Alignment:
Use leveling feet or adjustable supports to fine-tune the alignment of the planer.
Check for any misalignment or unevenness and make adjustments as needed to achieve precise planing results.
Testing and Adjustment:
Conduct test runs with the planer to verify the functionality and performance of the jig rig system.
Make any necessary adjustments to the parallel links, mounts, or alignment to optimize the operation of the planer.
Safety Precautions:
Remind viewers to prioritize safety when working with power tools and heavy machinery.
Emphasize the importance of proper assembly and alignment to prevent accidents and ensure accurate planing.
Conclusion:
Summarize the key steps covered in Part 2 of the project.
Encourage viewers to apply the techniques learned to their own woodworking projects and stay tuned for future tutorials.
By following these guidelines, you can create an informative and engaging Part 2 video for your parallel link planer jig rig system project, providing viewers with the knowledge and skills to build and optimize their own jig rig systems for precise planing.
-
 1:32:46
Glenn Greenwald
6 hours agoHillary Blames TikTok for Anti-Israel Sentiment; MAGA Sycophants Gain Pentagon Press Access; Who Should Win Anti-Semite of the Year? See the Top 10 Finalists | SYSTEM UPDATE #552
119K94 -
 56:12
56:12
Flyover Conservatives
23 hours ago100% Chance the Grid Fails: Why No One Is Fixing It (and How Easy It Is) - Tommy Waller | FOC Show
25.5K9 -
 LIVE
LIVE
JDubGameN
4 hours agoStarlink Network Test Stream! | Road to 100 Followers
481 watching -
 2:17:31
The Daily Signal
7 hours ago $5.82 earned🚨BREAKING: Tennessee Congressional Election Results, Minneapolis Police to "Intervene" Against ICE,
31.7K6 -
 1:52:47
megimu32
4 hours agoON THE SUBJECT: Christmas Vacation Is UNTOUCHABLE!
19.3K4 -
 59:56
59:56
Sarah Westall
5 hours agoNeurostrike, Cognitive Targeting & the New Tech Arms Race w/ Professor Armin Krishnan
16.1K4 -
 2:52:28
Nikko Ortiz
7 hours agoNo More Gear Fear... | Rumble LIVE
24.2K1 -
 LIVE
LIVE
Razeo
5 hours agoTopside carnage with some fries.,
56 watching -
 1:03:17
BonginoReport
7 hours agoViolent Criminals Run Free in NY & CA - Nightly Scroll w/ Hayley Caronia (Ep.188) - 12/02/2025
128K43 -
 6:33:02
The Rabble Wrangler
21 hours agoBattlefield with The Best in the West
11.8K