How to Build Your Own Acoustic Panels
#DIY #homerecording #acousticpanel
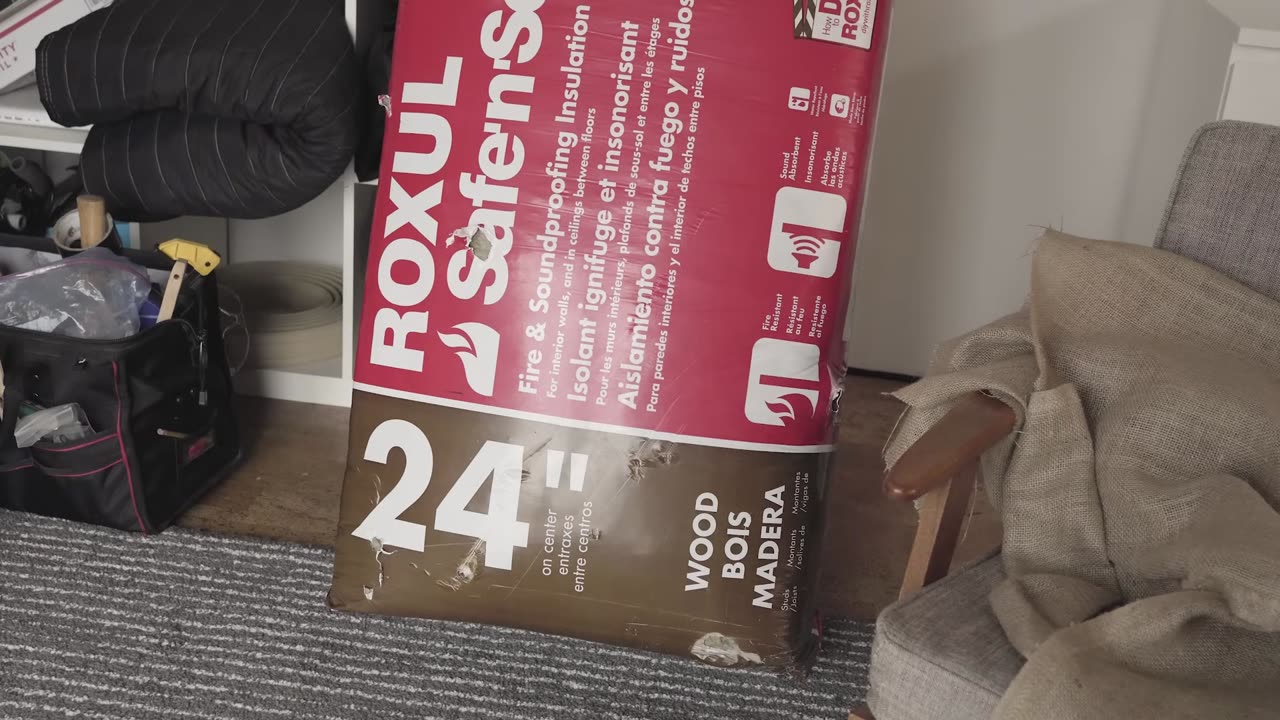
How do you dramatically improve your audio? Record in a space that's treated for sound. Below are all the tools, materials & instructions for building affordable acoustic panels. DIY Kit:
Total cost per panel: ~$25 and weighs 12-13lbs.
Music by PremiumBeat.com.
Tracks:
Blue Notes by: Mattijs Muller
BUILD
Step 1: measure for cuts
Take one of the 1 x 4 x 8 planks and make a mark at 47" inches.
On that same plank, make the next mark at 24.5" and what is left over will be another 24.5" piece.
Repeat the measurements above on another 1 x 4 x 8 plank.
Take another 1 x 4 x8 plank and make marks for two 47" pieces.
Take the 1 x 3 x 10 plank and make a mark every 9 inches. Then make a mark for two 23" pieces.
Start with the top of bottom side, wrap your fabric around the frame and place one staple into the middle and one into each corner.
Go to the opposite side and repeat the same process, remembering to pull tight as you staple.
Go to the side of the panel do this same process, one staple in the middle and each corner.
Turn over the entire panel and make sure your covering is tight across the panel.
Flip the panel back over and proceed to insert one staple approximately every inch, going around the entire panel, pulling tight as you go.
For the corners, fold the excess fabric in half forming a 45 degree angle and wrap it around the top and bottom corners of the panel, pull tight and staple to the back.
Step 5: finishing and hanging
To finish the panel, attach two 1-1/4" cork stoppers to each of the bottom corners of your panel. This will create space between the wall and your panel so that sound reflections can get trapped in the back of the panel.
To attach to the wall, I used one eye lag screw that allowed me to go straight into a stud and another screw with a wall anchor so that I didn't have to worry about finding another stud and could place the screws any distance I needed.
I made two holes in the back of the panel and hung them on the wall screws that I left a couple inches out from the wall to create enough space to create a gap between the panel and the wall.
-
 UPCOMING
Dr Disrespect
38 minutes ago🔴LIVE - DR DISRESPECT - SUPER ENTERTAINMENT POWER
1 -
 LIVE
LIVE
The Rubin Report
1 hour agoListen to ‘The View’ Crowd Gasp as Whoopi Admits She Agrees w/ Conservatives on This
3,357 watching -
 UPCOMING
The Mel K Show
35 minutes agoMORNINGS WITH MEL K Preserving the Home of the Brave 9-19-25
-
 UPCOMING
The Shannon Joy Show
2 hours agoSeeing Through The Noise - Doc Malik Interviews Shannon Joy
215 -
 UPCOMING
Film Threat
18 hours agoKIMMEL GONE! PLUS REVIEWS OF HIM + A BIG BOLD BEAUTIFUL JOURNEY + MORE | Film Threat Livecast
368 -
 UPCOMING
Tudor Dixon
3 hours agoDave Rubin on Charlie Kirk’s Legacy, Free Speech, & a Divided America | The Tudor Dixon Podcast
119 -
 LIVE
LIVE
LFA TV
12 hours agoBREAKING NEWS ON LFA TV! | FRIDAY 9/19/25
4,488 watching -
 1:00:49
VINCE
3 hours agoTrump Is Finding The Missing Children | Episode 129 - 09/19/25
180K84 -
 LIVE
LIVE
Nikko Ortiz
1 hour agoBeing Poor Is A Choice?! - Rumble Studio LIVE
213 watching -
 LIVE
LIVE
Caleb Hammer
2 hours ago$60,000+ For New Boobs | Financial Audit
217 watching