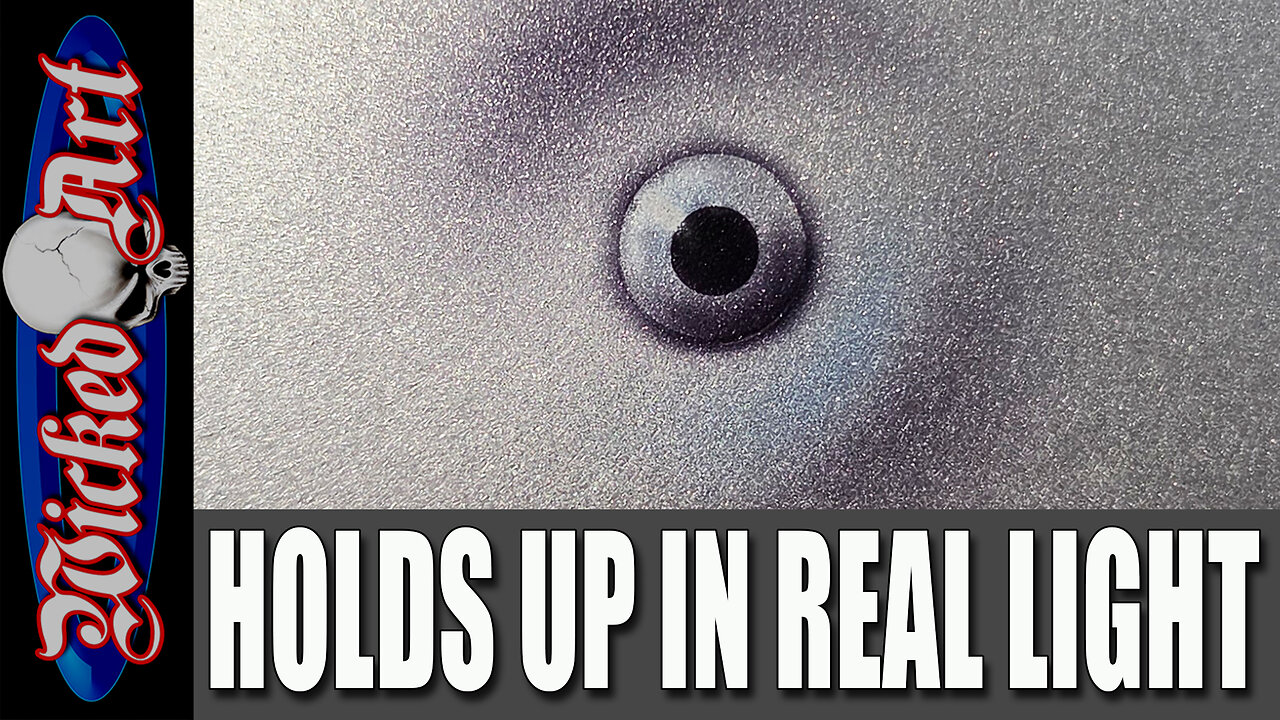
Airbrushing Realistic Rivets & Metal Panels on Metallic Paint (What Actually Works)
This video combines two full airbrush demonstrations covering realistic rivets and riveted metal panels painted over metallic and pearl basecoats.
The focus is on techniques that hold up under real lighting, not just in the studio.
In the first section, I demonstrate a common rivet painting method using opaque black and white over a metallic basecoat. While this approach can look convincing under controlled lighting, it often creates dull or “dead” highlights once the artwork is cleared and viewed in sunlight. I explain why this happens and what causes metallic reflectivity to be lost.
In the second section, I show the method I actually use when painting rivets over metallic and pearl finishes. This technique relies on transparent candy colors (aniline dyes) instead of pigment-based paint, allowing the metallic basecoat to remain visible and reflective. Contrast is built gradually using light layers, negative space, and controlled shading rather than opaque highlights.
This video also covers:
Choosing and maintaining a consistent light source
Using negative space instead of white highlights
Cleaning freehand shields during use
Adjusting contrast without over-darkening
Rendering butt-joined riveted panels
Rendering overlapping metal panels
Creating realistic panel gaps and distortion
Evaluating results after clearcoat application
This is a real-world airbrush workflow, shown without shortcuts or hype, intended for artists who want their metal effects to look correct under actual lighting conditions.
Chapters: This video contains two full demonstrations combined into one continuous presentation.
-
 UPCOMING
Sean Unpaved
1 hour agoBills Hire JOE BRADY As Their Next Head Coach! | UNPAVED
92 -
 1:06:08
The Rubin Report
2 hours agoIlhan Omar Finally Got Scared After Investigation Into Her $5M Winery Just Went Viral
19.8K37 -
 LIVE
LIVE
Wendy Bell Radio
4 hours agoTrump to Tampon Tim: It Stops Now.
6,707 watching -
 LIVE
LIVE
LFA TV
16 hours agoLIVE & BREAKING NEWS! | TUESDAY 1/27/26
3,940 watching -
 LIVE
LIVE
Viss
1 hour ago🔴(LIVE) - 1V3 SOLO VS SQUADS AGAINST ALL ODDS! | ARC RAIDERS HEADWIND
225 watching -
 LIVE
LIVE
TheAlecLaceShow
1 hour agoGuests: Roger Stone, Rep. Burlison, Rep. McCormick, Rep. Gill | The Alec Lace Show
49 watching -
 LIVE
LIVE
GritsGG
1 hour agoCamo Grind Continues #1 Warzone Victory Leaderboard 1060+ Ws!!🔥
41 watching -
 LIVE
LIVE
Nikko Ortiz
1 hour agoReacting To Gun Clips... | Rumble LIVE
121 watching -
 1:42:18
Benny Johnson
3 hours agoVICTORY: Tim Walz CAVES To Trump, Police Start ARRESTING Rioters & Working With ICE | O'Keefe LIVE
58.7K77 -
 LIVE
LIVE
SOLTEKGG
3 hours agoNEW GAME Called HighGuard
28 watching