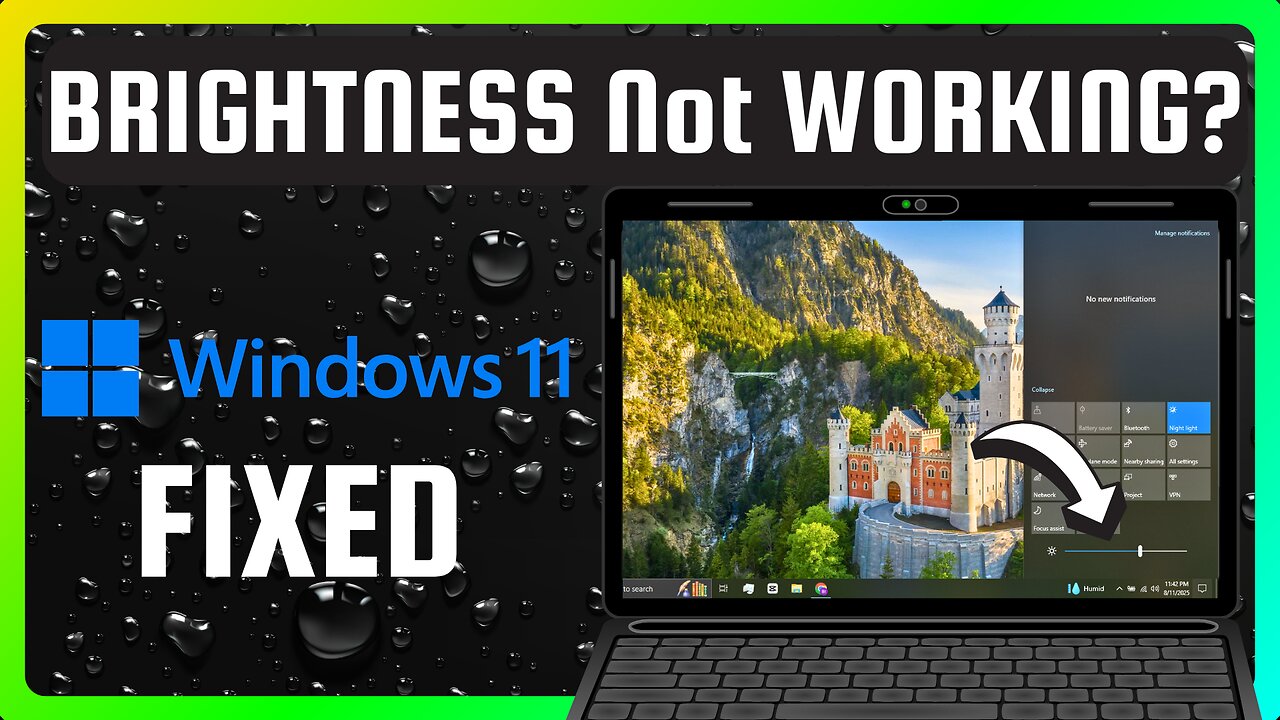
How to FIX Brightness Not Working in Windows 11 (in 2 Minutes)
How to FIX Brightness Not Working in Windows 11 (in 2 Minutes)
Is your brightness slider not working in Windows 11? Or is it greyed out? Don’t worry! In this video, I’ll show you 3 proven methods to fix brightness control issues quickly & easily!
📌 Follow These Steps (Timestamps Below)
Method 1: Enable/Disable Monitor in Device Manager
Press Win + S, type Device Manager, and open it.
Expand Monitors.
Right-click Generic PnP Monitor or Generic Non-PnP Monitor and select Disable.
Wait a few seconds, then Enable it again.
Restart your PC and check if brightness works.
Method 2: Reinstall Graphics Driver
Open Device Manager again.
Expand Display adapters.
Right-click your graphics driver (e.g., Intel, AMD, NVIDIA) and select Uninstall device.
Check "Delete the driver software" if available.
Go to Action , Scan for hardware changes.
Restart your PC.
Method 3: Run SFC Scan (System File Checker)
Open Command Prompt as Admin (search for CMD, right-click , Run as administrator).
Type:
text
sfc /scannow
Press Enter and wait for the scan to complete.
Restart your PC.
💬 Did this fix your issue? Let me know in the comments!
👍 Like & Subscribe for more easy tech fixes!
🔗 Follow for More Tips:
#Windows11 #BrightnessFix #PCSolutions #TechTips
#beneficialthings #howto
⚠ This channel NEVER SUPPORTS OR PROMOTES any illegal actions. All videos are only made to teach and share knowledge for learning purposes.
✅ Help support the channel and get extra perks! https://www.youtube.com/channel/UCbj1VlKgCI5JrQiYcja5-Bg
-
 LIVE
LIVE
Benny Johnson
1 hour agoTrump Launches 'Major Investigation' of Leftist Plot in Charlie Kirk Murder, FBI New Evidence…
6,518 watching -

VINCE
2 hours agoA Turning Point In The Culture | Episode 125 - 09/15/25
78.7K96 -
 LIVE
LIVE
LFA TV
12 hours agoLFA TV ALL DAY STREAM - MONDAY 9/15/25
4,901 watching -
 1:40:09
Dear America
2 hours agoBREAKING NEWS UPDATE! Dark Truth EXPOSED: Charlie Kirk's Assassin & the Trans Agenda-This Is WAR!
108K119 -
 LIVE
LIVE
Badlands Media
9 hours agoBadlands Daily: September 15, 2025
4,617 watching -
 LIVE
LIVE
The Big Mig™
1 hour agoUncaged Host w/ Controversial Patriot Ret. MLB Closer John Rocker
3,125 watching -
 LIVE
LIVE
Caleb Hammer
32 minutes agoHe Needs To Divorce Her | Financial Audit
109 watching -
 LIVE
LIVE
Chad Prather
35 minutes agoCharlie Kirk’s Impact Felt WORLDWIDE, Even At Coldplay Concert + Pastors SPEAK UP Across America!
345 watching -
 LIVE
LIVE
Wendy Bell Radio
6 hours agoWe Are Charlie.
8,517 watching -

Matt Kohrs
11 hours agoTesla Stock Is SQUEEZING (Market Open Analysis) || Live Trading
24.4K5