2GIG GC3: Setting Date & Time
Setting the date and time is one of the first steps you’ll take when installing your new security system. Our video shows you how.
2GIG GC3: http://alrm.gd/2gig-gc3
Get Monitored! http://alrm.gd/get-monitored
Your home security system is designed to keep you safe around-the-clock. But the system still needs to know the correct date and time for your location. This video shows you how to set the date and time for your 2GIG GC3.
Installation is covered in the previous video. After installation, the first step you’ll want to perform is setting the time and date. Fortunately, as the video illustrates, the process is simple and quick.
Once the GC3 is up and running, you’ll start the process by accessing the home screen. This is the main screen of the unit which displays current security settings, weather and the time/date. Note that the time currently displayed will likely be incorrect.
In the lower right corner of the home screen you’ll find a blue System Settings bar. Touching that opens up a screen where you’ll be required to enter your access code.
There are two types of access codes. The default installer code is used for initial setup while the master installer code is created by you for your specific unit. The installer code is only used to enter and exit the program. Additional details on access codes are provided in our next video.
Next, you’ll see the main interface. The video devotes some time to explaining the difference between the main interface of the GC3 and the previous model. Where the GC2 had a question-based installer toolbox, the GC3 has a grid of icons with more options outside the toolbox.
The video shows you the exact position of the Date/Time icon. Touching this button will take you a separate screen.
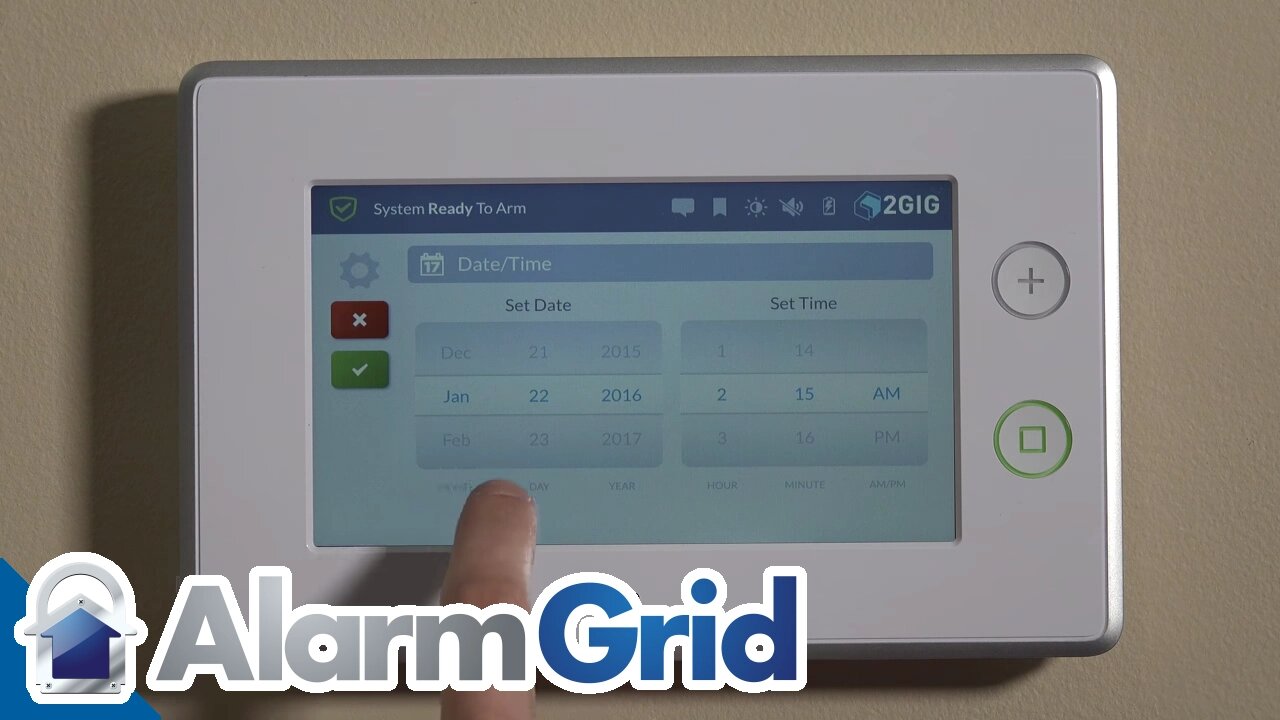
You don’t enter the date and time directly with a number pad. Instead, you scroll through virtual wheels to select the month, day and year. The time is AM/PM without a military option. Once you’ve selected the correct day and time, you’ll save your work by touching the green checkmark in the upper left of the screen.
The video then covers the use of the new home button. Both the GC3 and the previous model have a home key located on the right of the unit. It’s a physical button you can press to be taken to the home screen at any time.
While the home button in the GC2 had an illustration of a house, the button on the GC3 has changed to a square. Even though the functionality remains the same, we discuss why we actually prefer the earlier design. For new users, the house image is a bit easier to understand.
After returning to the home screen, the current date and time should be displayed. Not only is this convenient for the homeowner, but it also allows for feature scheduling.
Overall, setting the date and time is intuitive and easy. Plus, as one of the first steps you’ll perform, the process is a great way to become familiar with your new alarm system.
-
 3:31
3:31
Alarm Grid Home Security DIY Videos
1 year ago $0.01 earnedWireless Repeater: Use With Life Safety Devices
32 -
 13:17
13:17
AndresRestart
16 hours agoThis Mario Galaxy 2 Remaster Is Better Than We Thought!
344 -
 59:16
59:16
CarlCrusher
10 hours agoAncient Psionic UFO Contact in Skinwalker Territory with Vetted & WHY Files - Ep 3
166 -
 25:17
25:17
Esports Awards
16 hours agoFrom Gamer to CEO: Cherrygumms’ Journey in Esports | Origins Podcast #29
191 -
 20:08
20:08
Professor Gerdes Explains 🇺🇦
15 hours agoThe Polish Drone Strike was a Russian PSYOP
171 -
 5:57
5:57
Breaking Points
17 hours agoJudge DROPS Terrorism Charge Against Luigi
5942 -
 2:17:45
Side Scrollers Podcast
19 hours agoDestiny & Hasan in “Deep Trouble” + Legal Mindset on Charlie Kirk Firings + More | Side Scrollers
3.82K16 -
 55:35
55:35
Dialogue works
23 hours ago $0.25 earnedJohn Helmer: The Moves Russia Is Making to OUTMANEUVER NATO
3.11K7 -
 36:25
36:25
Actual Justice Warrior
1 day agoAna RAGES At Destiny
24.3K20 -
 28:35
28:35
itsSeanDaniel
2 days ago"BBC is Lying" - British Patriot REVEALS THE TRUTH about Historic London Rally
13K21